Nube Transfer is the first-ever content migration tool for marketing cloud.
The app is classified into 2 parts: First Content Deployment and Second is Content Clean-Up.
Let us start!
To start, there are two ways. First, when you already have a Nube Transfer account, and second, when you register for the first time.
Let’s start from the stage when you first come to Nube Transfer.
Come to Nube Transfer through this link - Sign-in
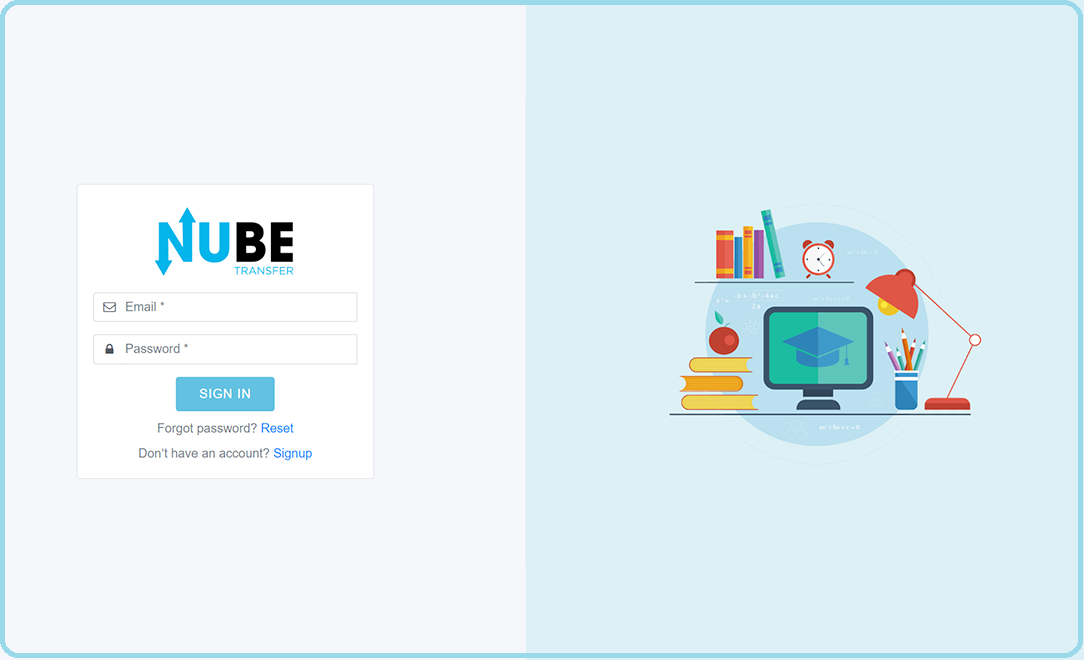
If you already have an account, fill the official business email address, and password in the given box, and click on the SIGN IN button.
On clicking the password reset link, you will be landed on reset password screen.
Mentioned the registered mail id.
Click the Reset Password button.
You will get a password reset link in your inbox, just like the one mentioned below.
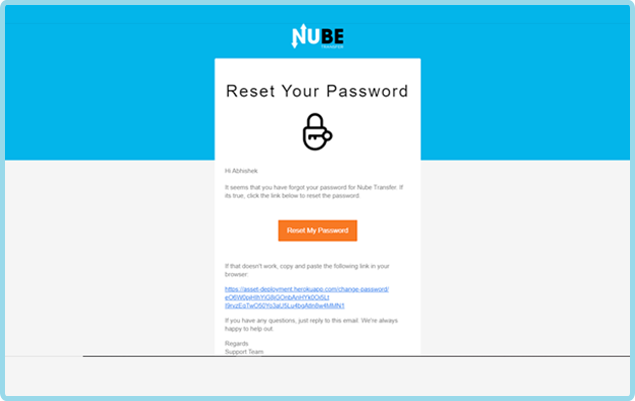
Click on the Reset My Password button, or on the link below that button.
Write a new password in the first box, confirm the new password in the second box, and click the Update Password button.
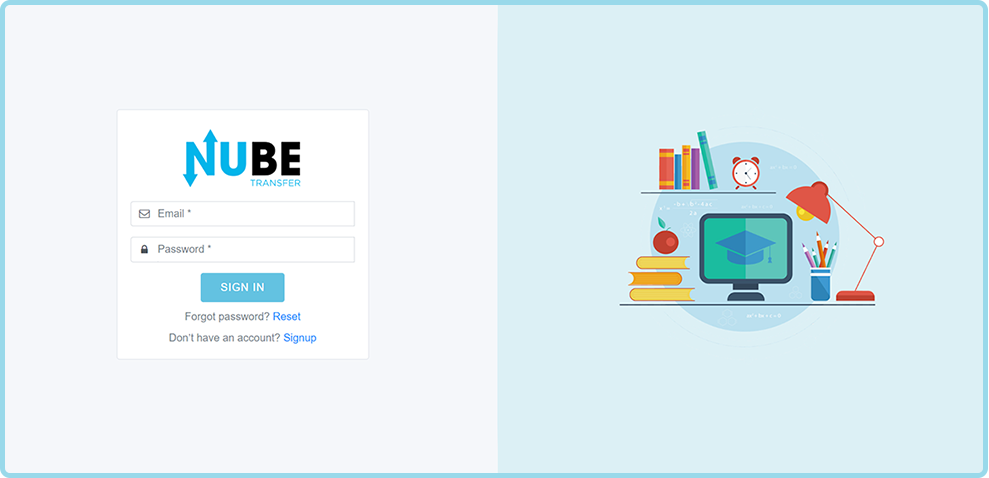
You will come on the Sign-in screen.
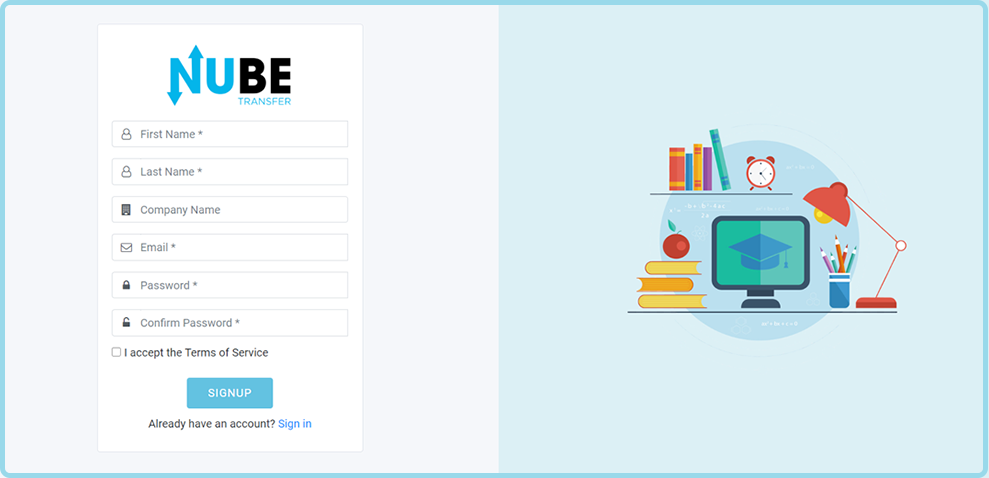
Those who do not have a Nube Transfer Account, they can click on the Sign-Up button mentioned on the sign-in screen.
This is the sign-up screen. Here is some essential information which you should mention before signing-up for this content migration tool. Following are the required fields you should fill to create your Nube Transfer account:
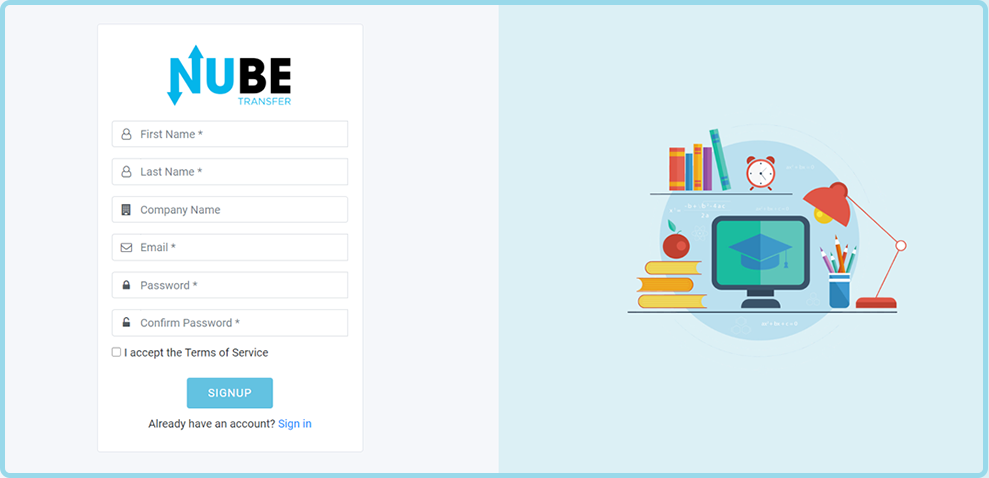
- Your official first name
- Your last name
- Company Name
- Your company email address
- Fill a strong password. Here are the criteria for selecting a strong password:
- Password length 8 to 14 characters
- At least one UPPER CASE
- Lower case
- Must have a number, and
- Special character
- Click on the checkbox to accept the Terms of Services
- Click on the Sign-Up button
After you hit the signup button you will see a message “An email has been sent to your email address. Please verify.”
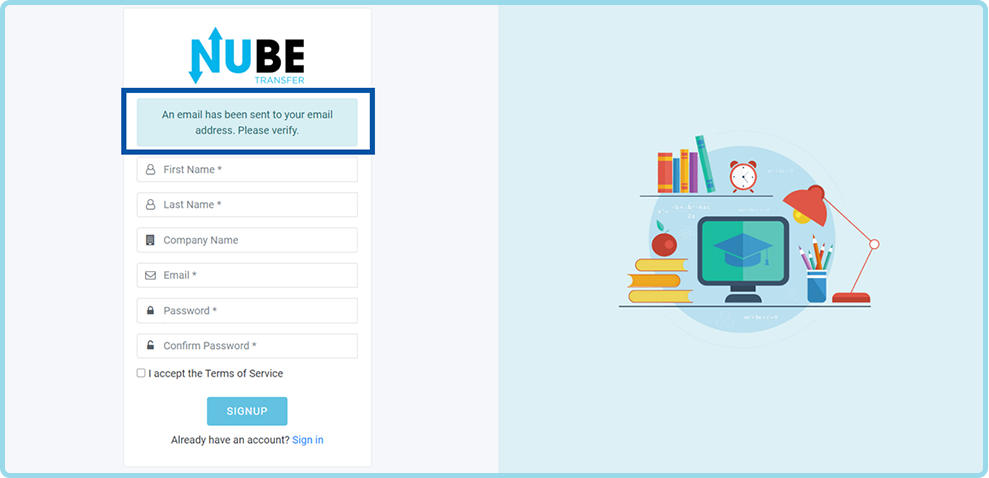
- Here’s the detailed email verification process.
- Open your inbox through which you have just registered on Nube Transfer.
- You will find an e-mail for Email Address Verification, like the one given below. (If you don’t find the email, please check in your SPAM folder, and move it in the inbox and add nubetransfer@fexle.com as a safe sender).
- Click on the Button, “Verify Email Now”. And you will reach on the sign-in screen.
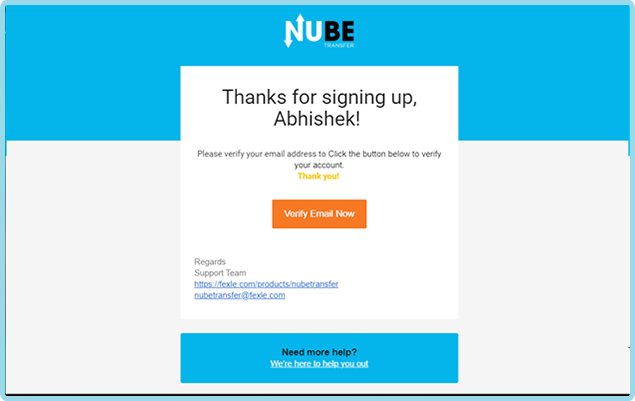
- The verification link will redirect you to the sign-in screen, the one like mentioned below.
- Type your email address d with which you have just registered.
- Type the password you set.
- Click on the Sign-in Button.

- After signing in you will come on the user-friendly dashboard of Nube Transfer.
- On the left, you will see a menu bar. For detail on the menu bar, please refer to here.
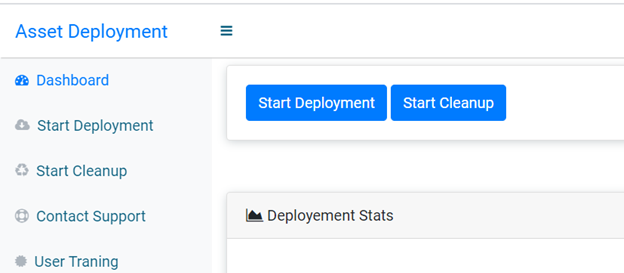
- There are two blue buttons namely Start Deployment and Start Cleanup.
- Below these buttons, the dashboard is divided into 2 parts.
- The left part shows the deployment status. It shows the historical data of deployment.
- The right part shows the cleanup status. To know more on the cleanup process, please refer to here.
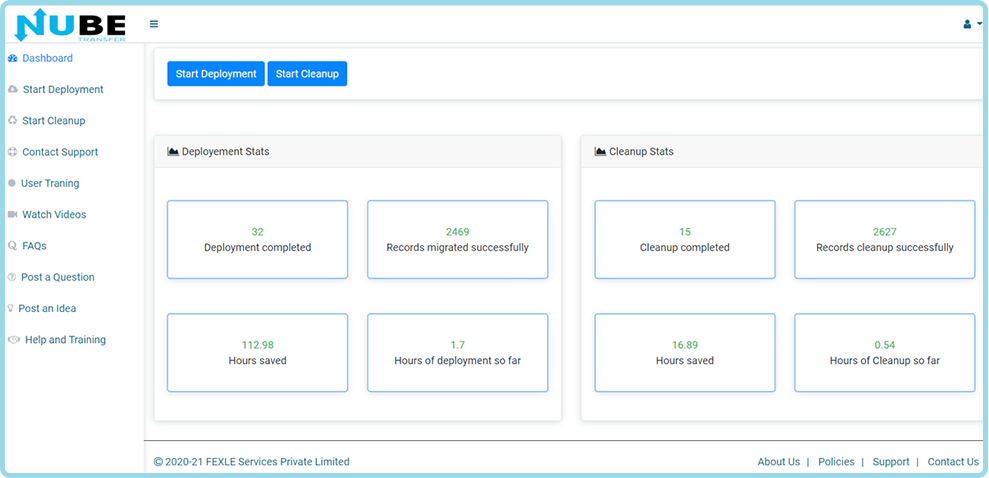
You can start content deployment by clicking the Start Deployment button above or by clicking the same first option on the menu bar.
Now before we move ahead and tell you how you can star your content deployment process, it is essential to know the marketing cloud integration process.
Here’s the process step in detail:
- Login Marketing Cloud Org.
- Enter Valid Username and Password
- On the Top-Right corner of your account, hover to the user profile icon.
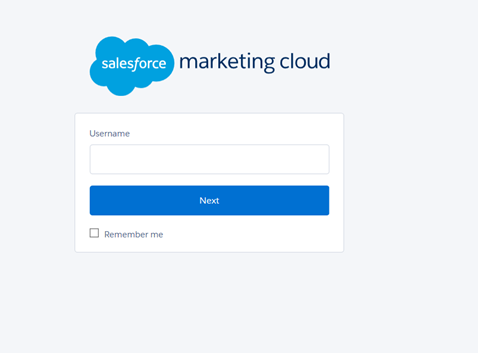
- Enter Valid Username and Password.
- On the Top-Right corner of your account, hover to the user profile icon.
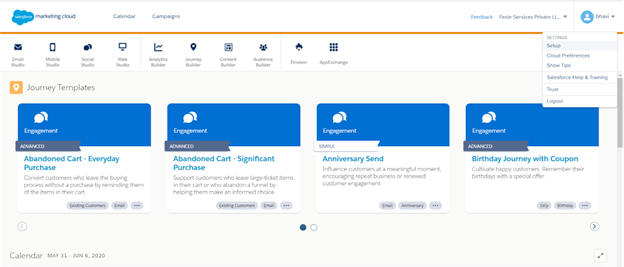
- Click on the Setup option.
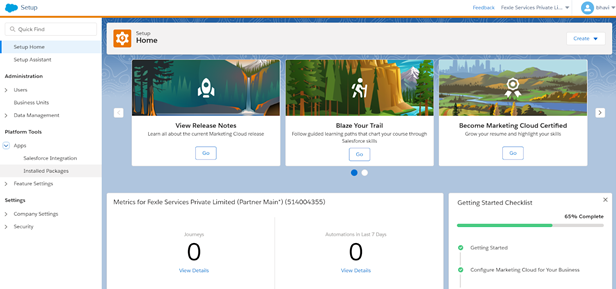
- A new screen will appear, like the one mentioned below.
- At the left, you will see a menu bar. Under the Platform Tools there is another sub-menu namely – Apps.
- Click on the App, and then click on the Installed Packages as mentioned below.
- Click on appropriate package name.
- Go API Integration section as mentioned in the image below.
- From here you have to copy three most important components. These components are – Client Id, Client Secret, and Authentication URL. All these 3 components will be used at the time of authenticating your source org from where you want to transfer your content. Get the details in the next point.
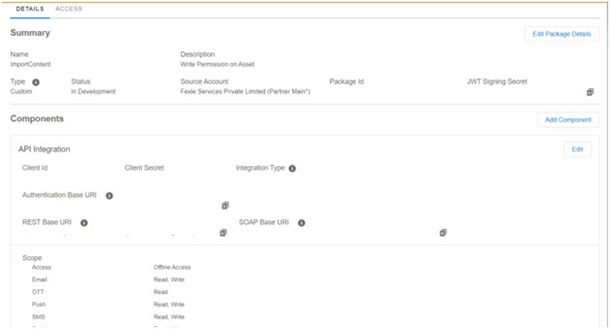
Note - If you migrate business unit then copy MID. (Click the business unit name and copy MID)
In the above given screen, at the right hand side of the given component, you will see an Edit button.
Click on this button, a dialogue box will appear which will ask you for source org verification request permission. The permission will be asked only for the source org.
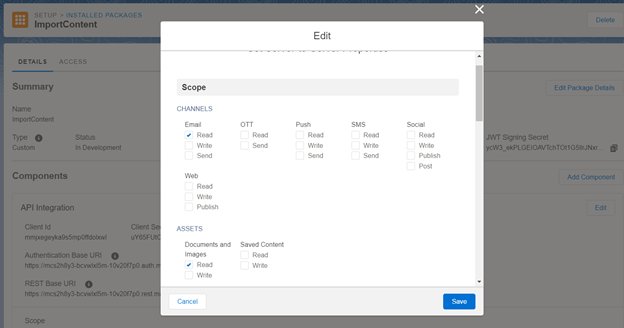
Here are the major components which require your permission. Click on the check box to give permission.
- 1. Email = Read
- 2. Documents and Images = Read
For Target org and cleanup org you need to click on every checkbox to verify request permission. Following is the list of major components which require permission:
- Documents and Images Read
- Documents and Images Write
- Saved Content Read
- Saved Content Write
- Email Read
- Email Write
- Push Read
- Push Write
- SMS Read
- SMS Write
- Social Read
- Social Write
- Web Read
- Web Write
- OTT Read
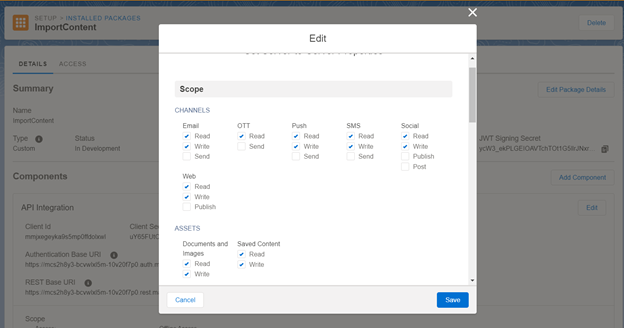
The above given screen is for setting the permission at the time of Target org and Cleanup org.
- The verification link will redirect you to the sign-in screen, the one like mentioned below.
- Type your email address d with which you have just registered.
- Type the password you set.
- Click on the Sign-in Button.
On clicking the button you will be redirected to the Choose Source Org screen. It is the screen which requires details of the source organization from where you want to transfer your content.
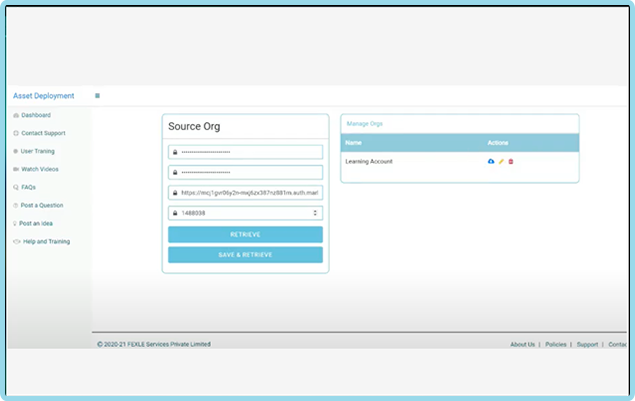
- Fill all the required details such as
- Client Id
- Client Secret
- Authentication URL
- Account ID
- After you fill all the details you will find two buttons below:
- Retrieve Button, and
- Save & Retrieve Button (For More Details on Save & Retrieve Option Refer To Click Here)
Retrieve – Click on this button and you will be directly redirected to the content migration screen directly.
Save & Retrieve – With this button, you can save the address for future reference. The information which you will fill here, it will be saved for the future, and the deployment process will move ahead. Refer To Point 16
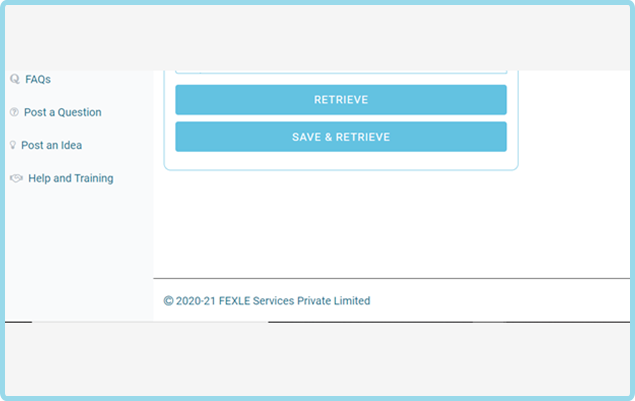
Note: While making a retrieve call, application checks for the relevant permissions. Please refer to the permission setup for more details.
It’s optional to choose the Save & Retrieve button. This is to help users if the users want to use the same configuration later and they don’t want to put the details again and again. See the Security section for more details about the security. Users can delete the configuration later on if needed.
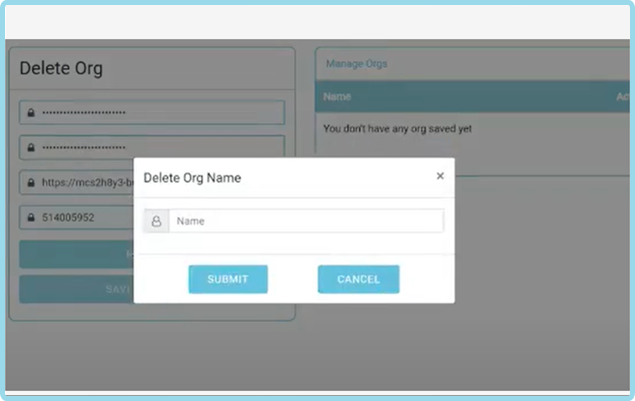
On clicking the Save & Retrieve button, a dialogue box will appear. It will ask you to specify the name of the source org for better management of orgs. You can mention any name of your choice, it will help you to remind the org or business unit and click the Submit Button.
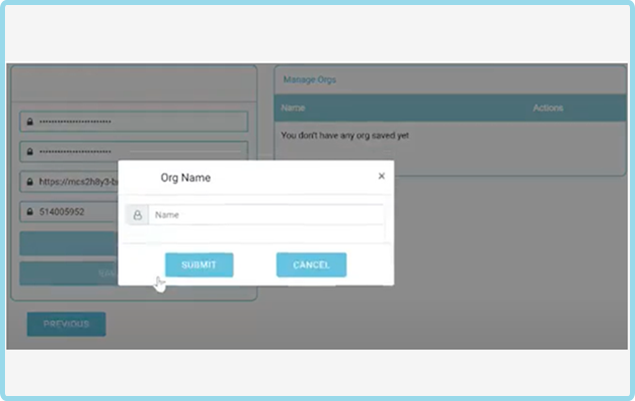
Once you click on the submit button you will be redirected to the screen where all the content from your source org will appear.
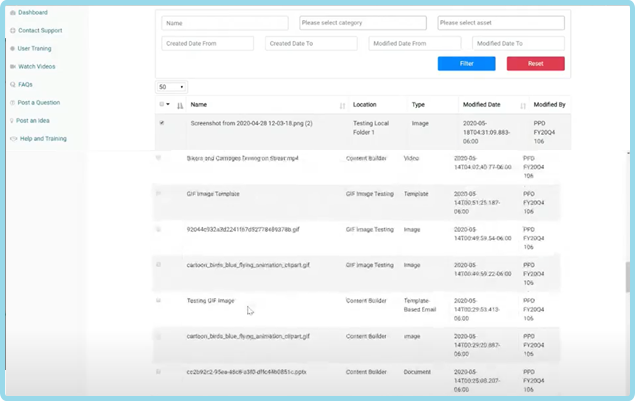
Mention image above highlighted line. It will help in understanding the points below.
- Here, above the table of content, you can see different boxes. These boxes are as follows:
- Name – The file name of the content
- Category – To transfer content folder wise.
- Please Select Asset – Type of content like image, video, doc, etc.
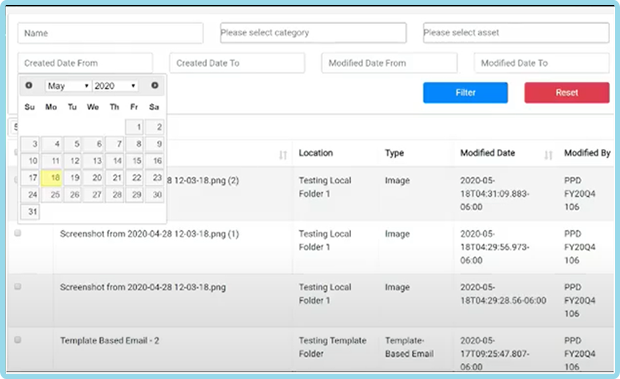
- Content Created From – Select the content created from a certain period of time.
- Content Created To – Select the content created to a certain period of time.
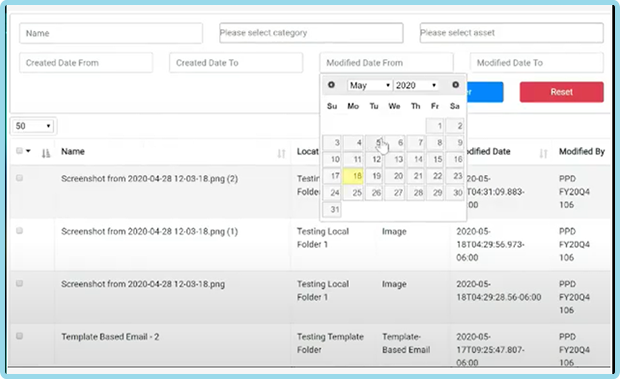
- Modified Date From
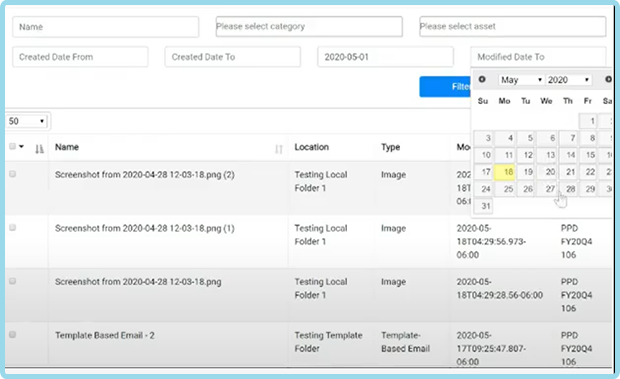
- Modified Date To
For More Details Please Click Here
- Below these boxes there are two buttons:
- Blue Filter Button – Help you filter the choice of content you want to transfer.
- Red Reset Button - Let you reset all the content in the table like before.
- You can see all your content from your source org appears in front of you.
- You can select content in two ways:
- Selecting each checkbox manually, or
- Click the checkbox at the upper left above the content table & select the content you want to transfer. Check the image below.
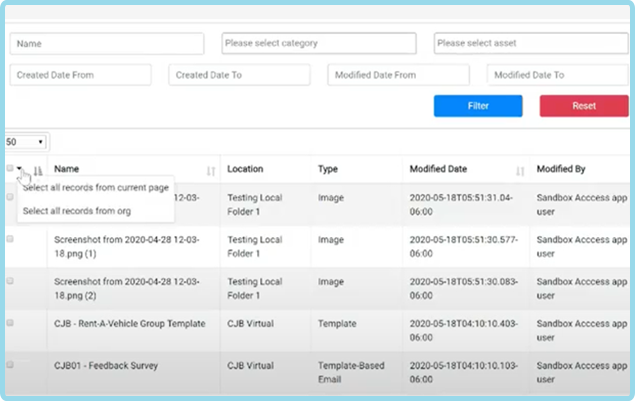
The dropdown menu has two options. You can transfer content, either by selecting all records from the current page (By default the page shows 50 content at a time, you can increase the number as per your choice with the help of given option) or by selecting all records from org (As it says, the entire content in your source org will be selected in one shot.)
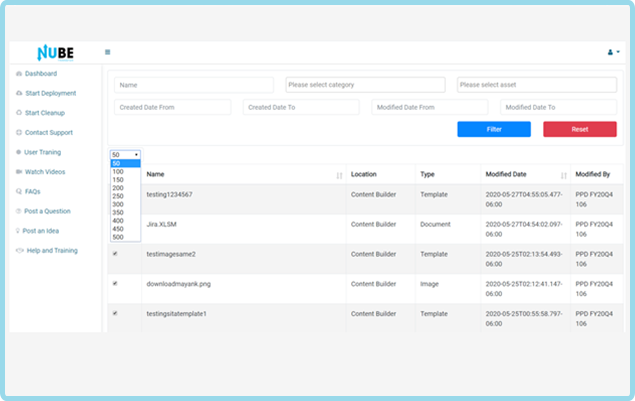
You can see a drop-down option in the below image. From here you can increase the number of content on a particular screen. (In case you want to deploy a specific number of content to another instance.)
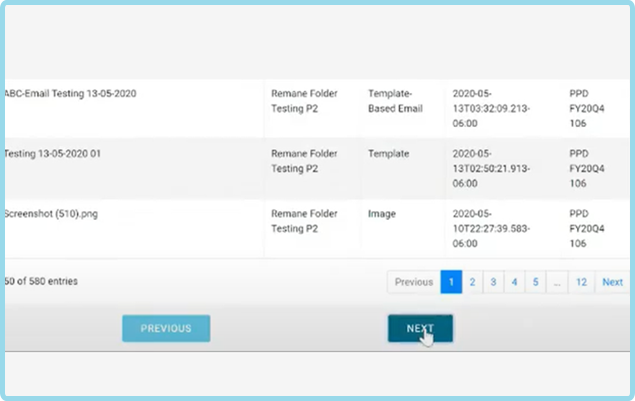
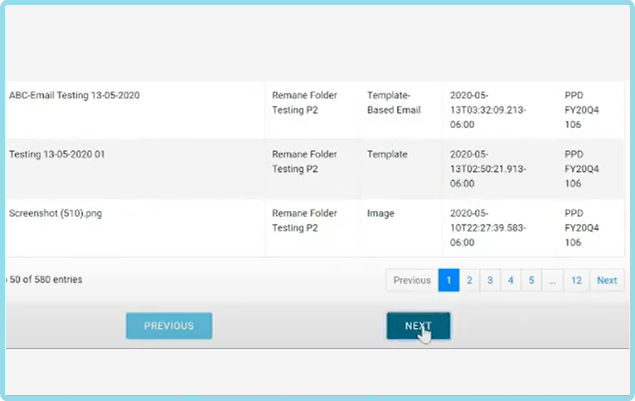
Next, scroll down the screen and you will see the pagination option. It will help you move back and forth on the screen.

Once all the required content selected, hit the Next button below the pagination option.
After you click the next button, you will land on the screen where you have to authenticate your target org.
Fill the required details of the org, where you would like to transfer your content.
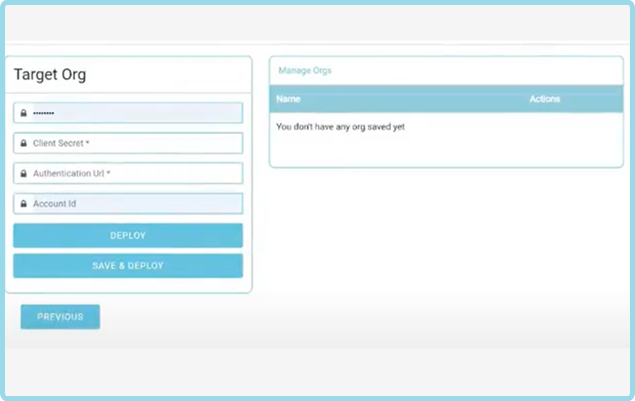
- Fill the required fields, as asked:
- Client ID.
- Client Secret.
- Authentication URL.
- Account ID.
- Click on the deploy button. Or
- Click on Save & Deploy if you want to use the same instance again. (For More Details on Save & Deploy Option Click Here)
The content is ready to deploy. Click the Start button.
There is a previous button mentioned below, in case you want to go to the previous screen.
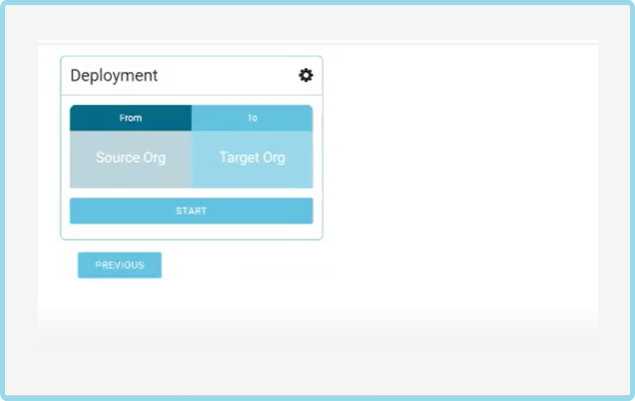
On clicking the start button, the deployment will start. The window shows the content deployment status.
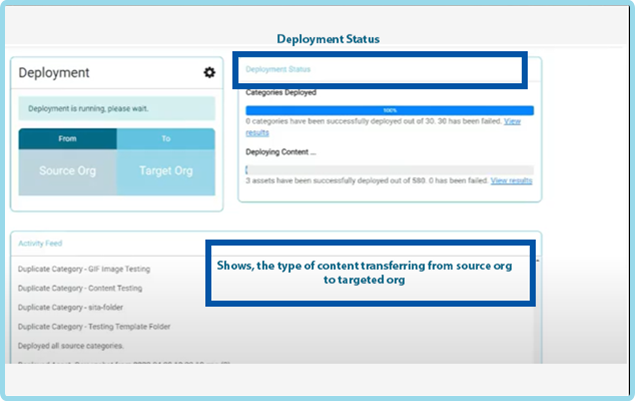
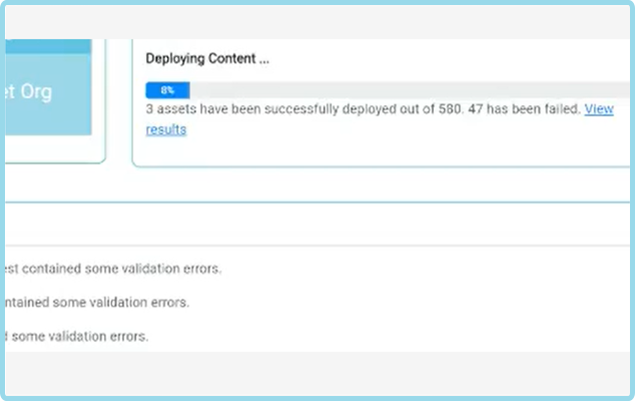
Click on the View Result button and check from where you will be redirected to the content screen and tell you where the error has occurred.
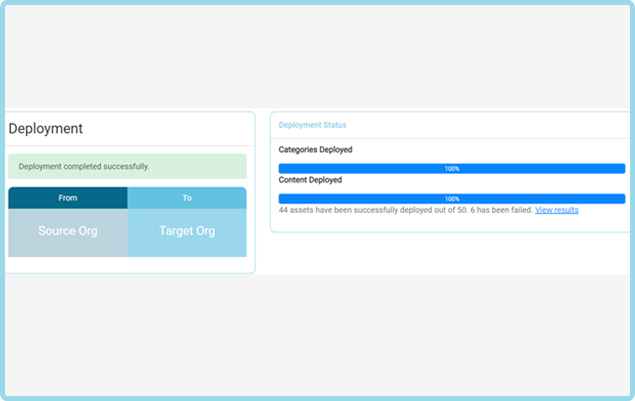
You can click on the View Results option. It will take you to the logs screen, where you can see the table of your entire content which has just been deployed from source org to your targeted instance.
After clicking view result option will come onto the screen where you can check the list of your deployed content.
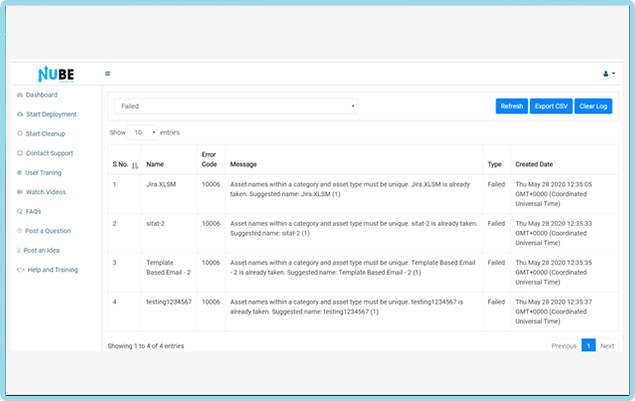
- On this screen, above the table of content, you will find a dropbox, from where you can select the type of content. It will allow you to see:
- All - All the deployed content
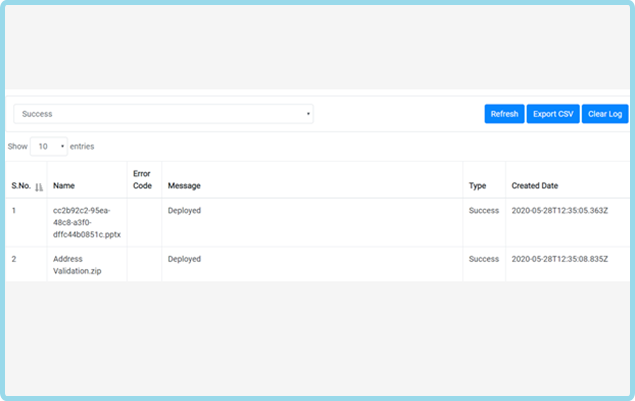
- Success – All the content successfully deployed.
- Failed – All the content that cannot be transferred due to some error. Refer to the image below.
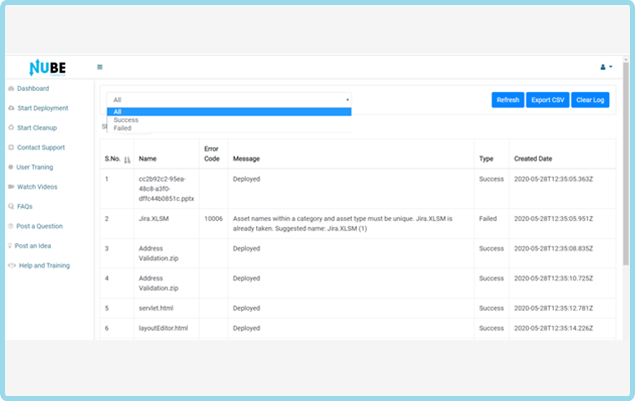
- On the Right side of the screen, above the table, there are three buttons:
- Refresh button – To refresh the list. It will bring the list in its original form as it was shown to you at first.
- Export CSV button – To let you down the entire deployed logs in the CSV format. You will get all the details under these headings:
- Name of the file.
- Error Code
- Message (deployed or any other message)
- Type (Succeed or Failed)
- Clear Log button – To delete the entire deployed log.
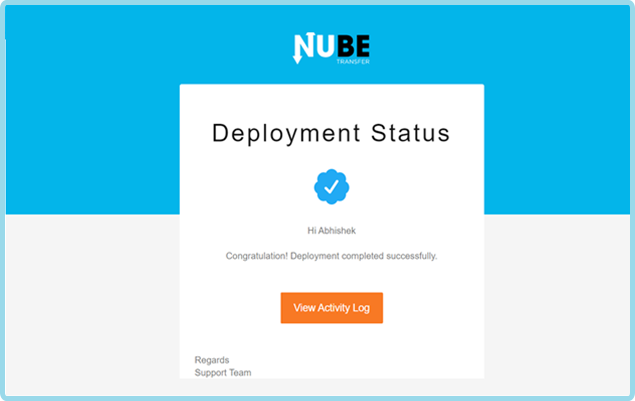
Once the deployment status will complete, you will receive a Deployment Status Mail on your registered business mail id.
Click on the Orange View Activity Log button, and can check all the deployed logs in a comprehensive way in a table. As mentioned above.
The cleanup process is for those who want to opt-out from the marketing cloud.
There are two buttons above, you have seen two buttons, Start Deployment and Start Cleanup.

To start the cleanup process, click on the dashboard option mentioned in the menu bar at the left.
Click on the cleanup button.
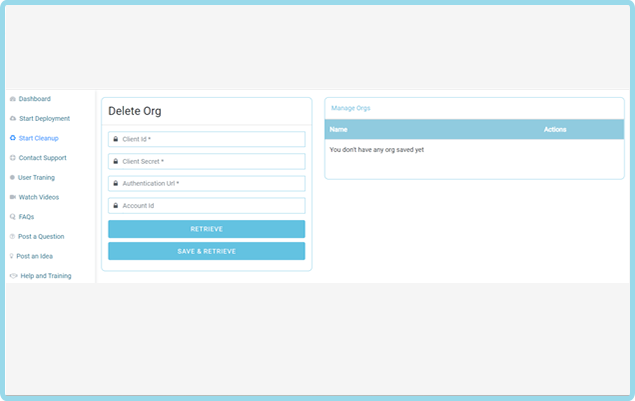
- When you click on the cleanup button, you will reach the screen, where it will ask for the details of the org you want to delete. Fill the details as asked in the screen, which are:
- Client Id
- Client Secret
- Authentication URL
- Account ID
- Click on the Retrieve or Save & Retrieve button as per your choice.
Select the number of content you want to delete.
Here you can see the list of content and the details such as its location, the type of content, the last time it was modified, and by whom it was modified.


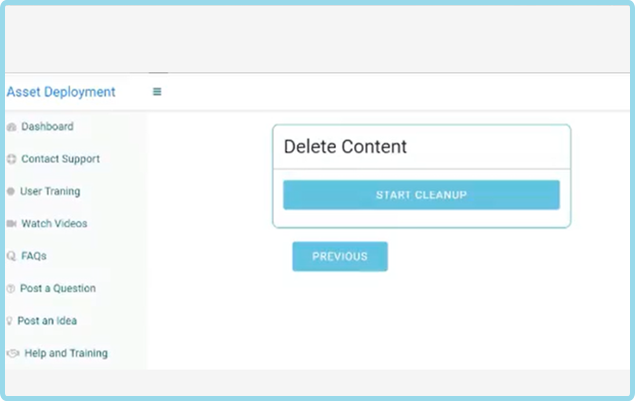
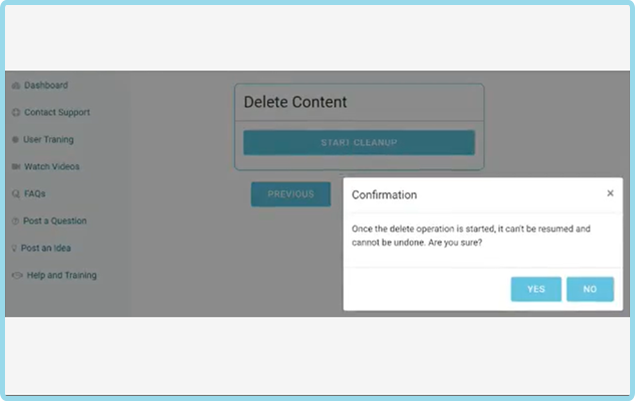
Then a confirmation box will appear which ask your final permission to delete the data.
Once the content is deleted, it cannot be resumed.
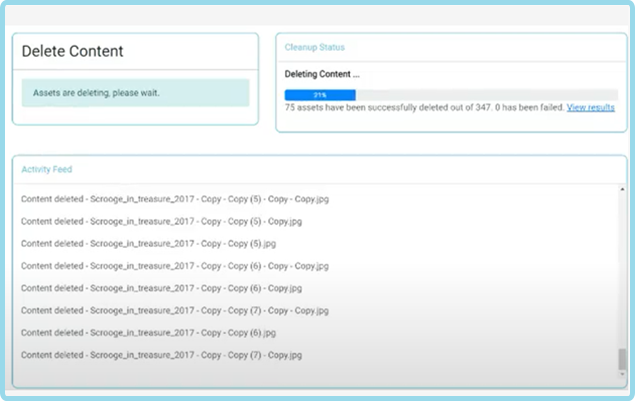

Users can also either transfer or clean up their content on the basis of different folders such as Name, category of content, type of asset, time-wise, date modified, etc.
Post selecting the folder, click filter, and you will have a complete required content list.
Please refer below images
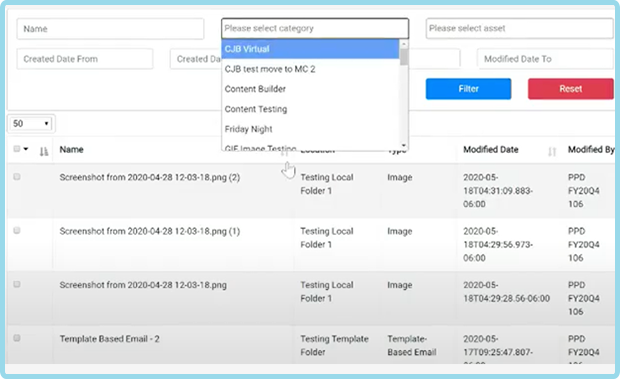
The Save and Retrieve button will be there at every stage of the content migration.
First, you will see at the time of authenticating your source org.
Second, you will see at the time authenticating your target org (here it is named Save and Deployed.)
And finally, at the time of deleting the org of the deployed content.

The Save and Retrieve Button will save your information for future reference, and you can easily deploy content without going through the painstaking step of filling all the details once again.
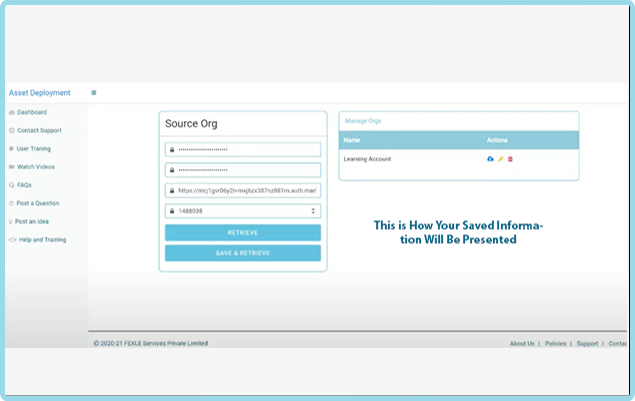
This is how your information will be saved when you click on the save and retrieve button for your future use.

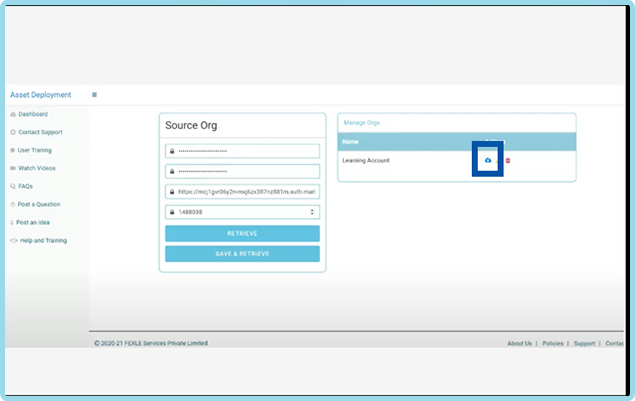
This is the retrieve button, which allows users to recover the saved information easily.
- Write the name of your choice.
- Click Submit Button

- The sidebar, a menu bar is very helpful in many ways. It has different options such as:
- Dashboard – Takes you to the dashboard
- Start Deployment – Takes you to the source org authentication screen.
- Start Cleanup - Takes you to the cleanup screen.
- Contact Support – It will tell you the details of our support team.
- User Training – It will let you access user-manual guides.
- Watch Videos – Watch videos on Nube Transfer.
- FAQs – Frequently Asked Questions for Nube Transfer.
- Post a Question – Share your thoughts/queries with us.
- Post an Idea – Share your ideas with our team to enhance Nube Transfer functionalities.
- Help and Training – To get help and training on executing Nube Transfer.


